
For a new learner, it is easy to find the answer on the Internet for “How does 3D rendering work?”. In this article, Visulise will give you expert knowledge most straightforwardly. Then, you can have the best base when learning 3D rendering.
What is 3D Rendering?
3D rendering is a stage of creating 2D images from a 3D model or scene. Each image demonstrates a part of the object. They are lifelike, vibrant, and light. 3D rendering comes after the 3D modeling stage in the 3D visualization process. 3D modeling output is an object or surface in a three-dimensional space.People have practiced turning 3D objects into 2d images in many ways. It was in the 1800s that advanced techniques revolutionized this industry. Then, many software is updated to simplify 3D modeling and 3D rendering.You should notice two types of rendering 3D models before starting:
- 3D real-time rendering: Graphic software creates an illusion of motion. Each second often has 20 – 120 images (frames).
- 3D post-processing rendering: Engineers repair minor errors and add design effects to create the most realistic and gorgeous work.
See more: what is 3d rendering?
Where is 3D Rendering Used?
3D Rendering appears in most industries of life. 3D rendering is the most popular in
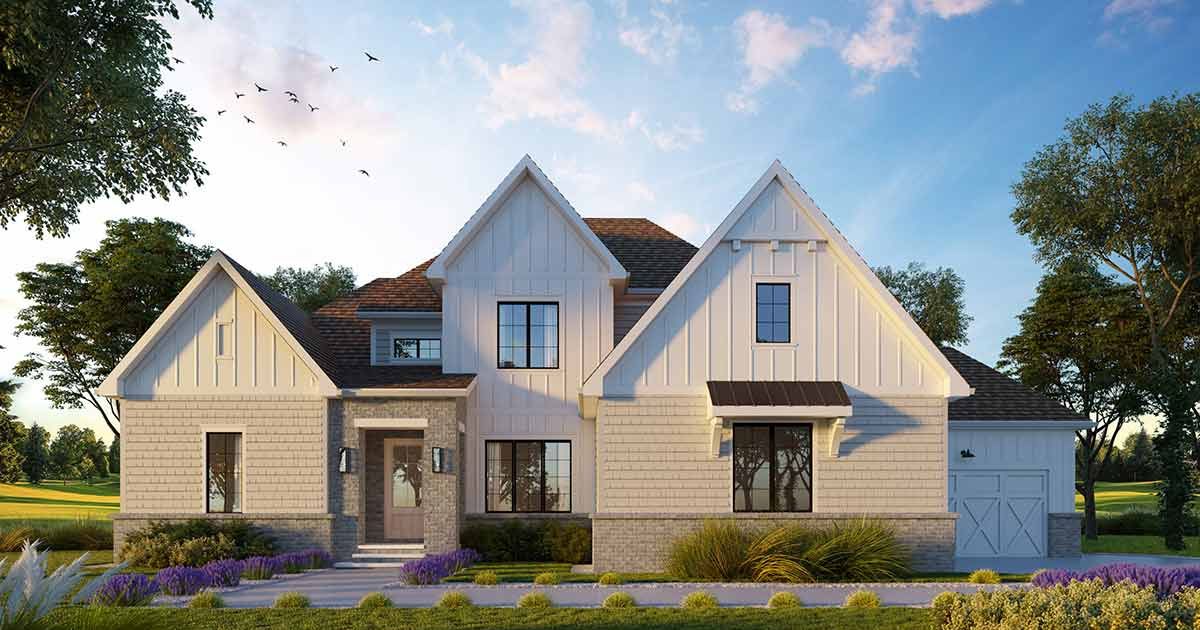
- Architecture: Thanks to 3D renders, engineers can see the tiny details to review the strength and weaknesses of the structures.
- Real estate: 3D renders can intuitively demonstrate every corner of a building, a house, and the surrounding area. Therefore, customers can imagine and decide faster.
- Interior Design: Using 3D rendering software, designers can easily create many options with different themes and textures. Then, buyers can choose the most suitable style.
- Advertising and marketing: 3D rendering outputs are light, vibrant, and intuitive. They are wonderful documents to present ideas, pitch a proposal, or release a new product.
- Development: With a high level of detail, you can check if your 3D product has mistakes or imperfect features.
- Entertainment: 3D render drawing technology plays a vital role in creating engaging cartoons, movies, and virtual games.
How does 3D Rendering Work?
Rendering 3D models should be in a logical workflow. A proper process can help you to avoid editing the renders many times. There are three main stages: Pre-Rendering; During Rendering; After Rendering that you can practice.
Pre-Rendering
It is essential to prepare carefully before rendering. Practicing the below steps will bring you a clear order of necessary tasks.
Vision

Getting the project’s vision is complicated and requires an experienced instructor. The core information you should research is the project’s goals, customer insights, and product features.
Analysis and Design
Next, after analyzing the vision, you can decide on design styles, color, texture, lighting, camera angles, etc. You even have a complete sketch in your mind.
Modeling
Without a 3D model, you cannot create a 3D render. The 3D modeling stage requires complex techniques to finish. It is time-consuming, too. Hold in hand how to make a 3D model and make it perfect to have a quick rendering process.
During Rendering
To bring the object, scene, or surface to life through renders, you should decide on the camera angles (or view angles). It helps you know how to add texture, lights, and details as realistically as possible.
Materials and texture
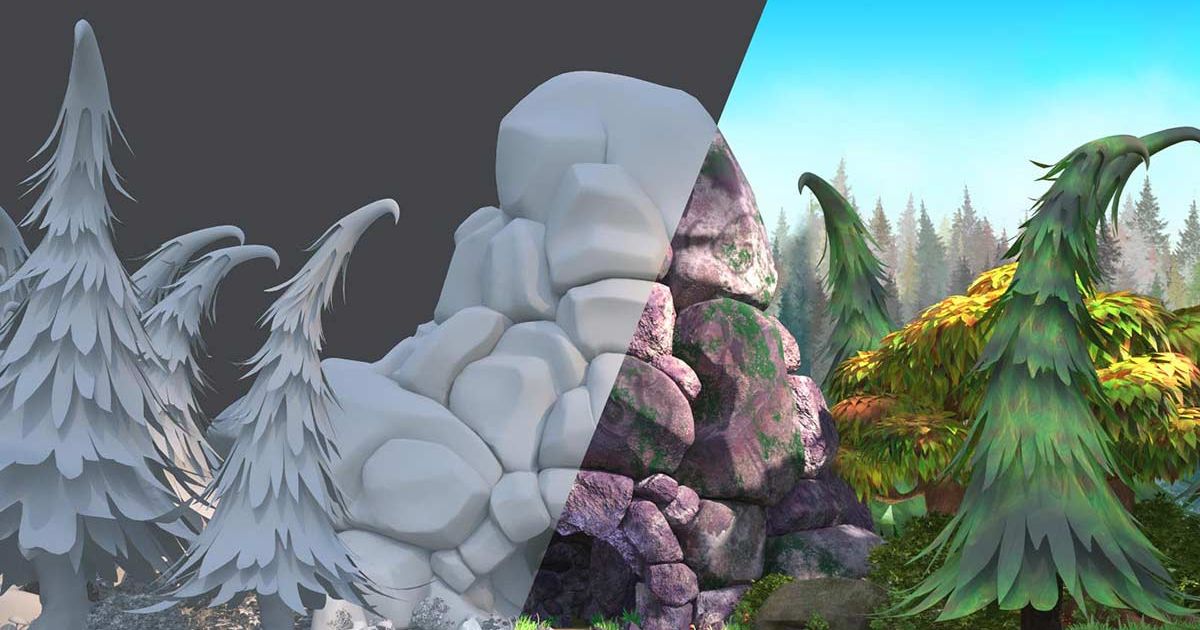
In this step, engineers adjust the material look. Each material has different surfaces, colors, roughness, gloss levels, etc. For example, Polypropylene is often slippery, while the gold surface is shiny.*Tips: Understanding the material features and observing the object will help create a clear visualization.
Lighting
Light is a must-have element in any 3D render. Without lights, the 3D model looks fake. Lighting is to add shadows, reflections, and highlights.
Details
Adding details means sculpting other parts for the 3D work, such as curvature, acute angle, etc. The level of detail depends on the goals. So, be sure you hold in hand the project’s requirements.
Feedback and refining/Post-production
It is crucial to review and refine 3D renders before publishing the final. You can realize mistakes and inappropriate details to make essential changes thanks to comments.
After Rendering
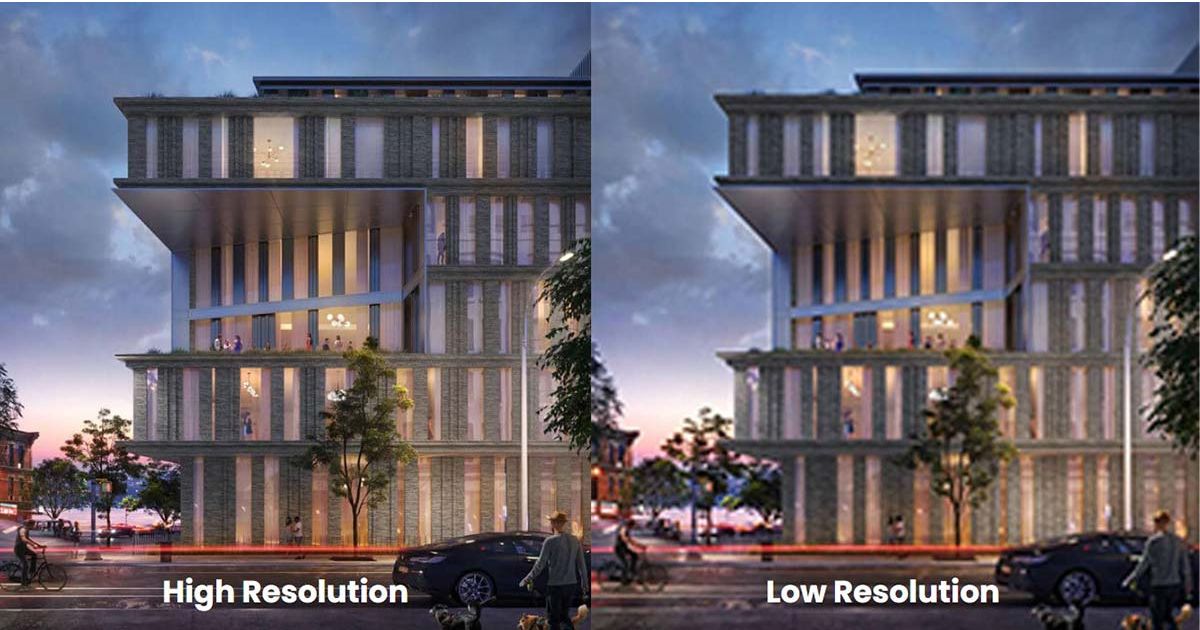
The final step in the 3D rendering process is delivery. Rendered images can serve many purposes, such as printing, web, video, or film. It depends on customer needs. Pay attention to the size and resolution of the rendered images.
5 Benefits of 3D Rendering
3D rendering is an easy and cheap way to read and visualize a 3D model. Here are the top benefits you can see:
- Fast creation: When making rendering, engineers have an available design to add essential elements. Therefore, it often takes less time than to model a 3D object.
- Easy to communicate: visual images help clients to see multiple viewpoints of the future 3D product. Then, engineers can adjust the relevant details. When the product is on sale, the return rate might be lower.
- Accurate measurements: 3D renders describe the 3D models on a specific scale. Architects can find ways to improve the construction.
- Low cost: Compared to hiring photo studios after producing 3D objects, it is much cheaper when creating 3D renders. You can get multiple viewpoints of your products at an affordable cost.
- Persuasive document: If you need to call for capital, do marketing, or pitch for a project, 2d images are visual, lively, and highly compelling.
5 Challenges of 3D Rendering

It can be difficult to create high-quality 3D renders from scratch, especially when trying to replicate something complex or irregular. You might face some challenges when practicing:
- You will need the appropriate software and a lot of patience to complete the final.
- Although it is the most optimal method, it might cost thousands of dollars for a large-scale project.
- It is difficult to make the models realistic with the right proportions, size, and details.
- Textures and materials might reduce the realism of the model.
- Adding light is hard. You must practice hard and pay attention to your surroundings to find out how it works in real life.
5 Best Practices of 3D Rendering and Level of Detail
The goal of practicing 3D rendering is to create the best images fastest. Here are Visulise’s tips:
- Moderation in Lighting: Prior natural outdoor daylight for everyday photography needs. Apply standard three-point lighting setup for night scenes and studio pack-shots.
- Make it soft: It is unnecessary to keep symmetry, hard angles, and straight lines accurate. Unevenness, jagged corners, etc., can create a realistic look.
- Get fluent in 3D rendering tools: Whenever you want to add an effect or use a tool, you can immediately know where to use them. Besides, it will help you combine the software features to design the unusual details that a single tool cannot handle.
- Know different techniques of 3D rendering: Each method has distinct ways of combining perspective, lighting, and detail. They are Real-Time, non-real-time, multi-pass, ray tracing, etc.
- Be observant: A good observation helps you review whether the grain, depth of field, and chromatic aberration are realistic enough.
In addition, more tips from the experienced might be helpful:
- Lower polygon numbers by hiding necessary angles or using low LOD.
- Use LOD for textures to minimize them.
- Lower the amount of everything, such as lights, size, etc.
- Find a midlevel polygon count for a million-polygon object to shorten the render time.
FAQs
What is the process of 3D rendering?
The method of 3D rendering includes three stages, divided into eight steps:
- Pre-rendering: Get the vision, Analyze and Design, and Modeling.
- During rendering: Add material and texture, Lighting, details, and Refining.
- After Rendering: Publish and Deliver to the client.
What is needed for 3D rendering?
It is necessary to have a PC with a strong GPU. Graphic cards are the most crucial element for running your computer smoothly. Besides, a modern CPU, ample RAM, and storage are essential.Besides, choosing the best 3D rendering software is vital. Entertainment, games, architecture, or printing requires different tools and features.
Is it hard to 3D render?
Many people say that rendering 3D models is simpler than 3D modeling. It might be hard for new learners because they have to handle multiple complex things to make the rendered images more realistic.
How Much Does 3D Rendering Cost?
In general, the rates are from $50 to $550. The cost might be high when the level of complexity increases. It can be around $500 to $5000, or even more.
Read more: how much does 3d rendering cost
How Long Does 3D Rendering Take?
A simple project takes an average of 3 – 4 days to finish. The time varies based on the complexity and scale. Some projects might take 2 – 3 weeks or even months.
Conclusion
In summary, 3D rendering is the final step of the 3D visualization process. It often includes eight steps to complete. The method of a 3D product rendering service might take fewer or more steps, but it’s the basics. Hopefully, this article can give you a clear answer to “How does 3D rendering work”. Remember to check more helpful articles about the 3D industry on our websites.
Related Posts: